
These DIY closet shelf ideas run from a Saturday afternoon with basic brackets to a full built-in with integrated lighting and drawer stacks.
What decides which one belongs in your closet is how permanent you want the install to be and how much storage you actually need.
The melamine boards I keep specifying for rentals start at 3/4 inch, and that thickness is what keeps a loaded shelf from bowing after a single season.
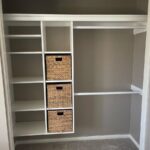
1. Custom Closet Shelves with Melamine Boards

Melamine boards give you that clean, built-in look without the built-in price. I like them for rentals and first homes because the white finish reflects light and the laminate surface wipes clean.
Check that your closet walls are reasonably square before you cut anything. Melamine chips if you force it into a gap on either side, so leave a little room and let the wall or the bracket do the work.
I would plan the vertical dividers first, then size the shelves to fit between them rather than wall to wall.

We understand that every space is different, which is why our shelves are custom-cut to your desired dimensions. This ensures a perfect fit and a seamless integration into your interior design

Premium Melamine Construction: Crafted from dense, high-quality melamine, these shelving boards are engineered to be sturdy and durable for daily use. The open-shelf design ensures clear visibility and straightforward access to your organized items.

We understand that every space is different, which is why our shelves are custom-cut to your desired dimensions. This ensures a perfect fit and a seamless integration into your interior design
2. Brackets for Closet Shelves

Metal track systems with L-brackets let you move shelves as your storage needs change.
Hardware can read as deliberate design instead of afterthought if you treat finish as a choice, not a leftover. Black against light wood is one pairing that makes the bracket part of the look.
For a closet nook like this, I would mount the vertical standards directly to studs; drywall anchors sag over time under shelf weight.
Buy the longest track that fits your wall height without cutting; you lose less strength and the install stays cleaner.

Abundant Quantity for Versatile Needs: this closet system part package includes 2 pcs of 47.5 inch long twin rail upright and 6 pcs of shelf bracket; The comprehensive set allows a simple assembly process and offers complete support for your shelving needs; The white metal of the twin rail upright enhances the look of any space while ensuring durability

Comprehensive Package: our package consists of 10 adjustable shelving brackets, easy installation without tools, designed to cater to your extensive storage or display needs, ensuring you have adequate brackets for multiple shelves

Sturdy Shelf Pilaster: Our metal shelf standards with silver coated finish, the high quality alloy steel has excellent oxidation resistance and rust resistance, stable and sturdy than normal shelf storage. The super long metal shelving design allows you to put more items
3. Adjustable Shelves

Pin-hole adjustable shelves are what I specify when a closet serves more than one person or more than one season. The rows of holes let you raise a shelf for boots in winter, lower it for flats in summer.
The hardware is simple: shelf pins, a drill bit sized to your pin diameter, and a strip of tape on the bit as a depth stop so you don’t blow through the cabinet side.
I would drill the holes before assembly, not after; a jig keeps them straight, but a careful hand and a clamped ruler work for a single closet.

Shelf peg pin diameter Φ: 5mm. Pegs pin length: 8.7mm. Total length:18.9mm

【Durable Material】Pegs for shelves made of high quality zinc alloy and polished nickel,good quality and durable for long using life,surface is smooth without metal burrs,can meet your daily shelving needs.

【Durable Material】Pegs for shelves made of high quality polished nickel,good quality and durable for long using life,surface is smooth without metal burrs,can meet your daily shelving needs.
4. Add Finish Trim

Gold trim against white shelving turns a basic install into something that reads finished. The metallic line catches LED light and draws the eye upward, which helps in a narrow walk-in where you want to emphasize height over width.
I would use aluminum trim channel rather than trying to paint a line straight by hand.
It comes with peel-and-stick backing now, which saves the nail holes that can split melamine edges. Adhesive holds best on smooth, dust-free surfaces; rough-cut plywood edges need a different approach.

Complete Range of Folding Door Hardware Repair Kit Parts: 2-Pack Bifold door hardware kit includes 2 top metal pivots, 2 top plastic pivots, 2 bottom pivots, 2 x 7/8" plastic guide wheels, 2 bottom pivot brackets, 2 top pivot brackets, 6 mounting fasteners, and 1 installation manual. Closet door hardware kits can quickly and easily repair doors weighing up to 50 lbs. and with thicknesses ranging from 1" to 1-3/8", suitable for 7/8"-1" wide track. (Please note: Track and hinges are not included.)

PRACTICAL: This closet organizer hardware is a cost-effective way to utilize and expand valuable closet space. Designed for use with Aluminum or metal closet rods up to 19/32" (15mm) diameter.

Designed to support wood shelves 11-inches to 14-inches deep. Brackets sold individually and hardware/tracks not included
5. Shelves with Integrated LED Lighting

Warm LED strips beneath each shelf turn a linen closet into something you actually want to open. The light source stays hidden, so you see the glow on towels and baskets without glare in your eyes.
I would wire this to a door-jamb switch so the lights come on automatically.
Battery-powered strips are easier to install but I replace dead ones for clients on a schedule that never seems to surprise anyone. 3000K temperature matches warm wood tones; anything cooler starts to look clinical.

DIY CUSTOM LENGTH - Come with 3200 pcs diodes/32.8ft under cabinet cob led strip lights, the strip lights can be cut every 0.975in/2.5cm, you can cut the length flexibly and freely combination, great for kitchen under cabinet, closet, bookcase, gun safe, Display case, floating shelves, wardrobe, bar shelf, curio cabinet, pantry

【Super Bright】 ---31W bright warm white cabinet lighting kit. No LED dots. No light glaring.

💖【DIY COB LED Strip Kit】: COB LED Strip Light There are 6 pieces 1m/3.3ft long LED strips.With US Plug power supply,LED Strips can be cut at every 2.5cm.they are flexible during assembly, for different scenes. You can DIY yourself.
6. Shelving Unit with Built-in Drawers

A central drawer stack flanked by open shelves and hanging rods gives you the storage mix most closets actually need.
The drawers hide what open shelves cannot: undergarments, accessories, the visual clutter that makes a closet feel smaller than it is.
I would size the drawers at 8 inches minimum interior height for folded sweaters; anything shallower and you are stacking two deep, which means you never see the bottom item.
Leveling feet matter more on hard surfaces than on carpet, where the pile hides a little unevenness.
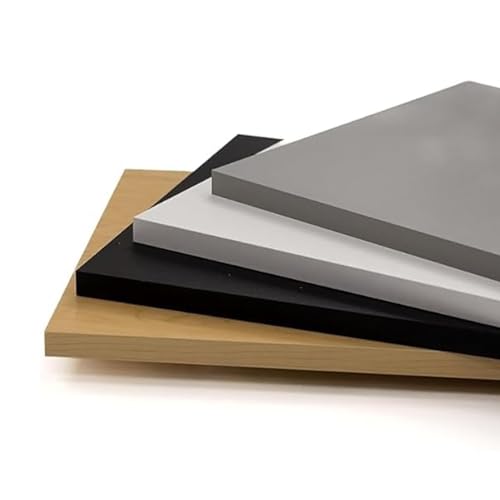
KITCHEN SHELVES ORGANIZER: Upgrade your space with premium melamine shelves cut to size up to 60". Also, available in Chocolate Dark Brown and Mahogany, in depths of 1/2” and 3/4”, these sturdy boards adapt to your needs, offering a sleek, modern look. Perfect for home or office organization, they provide a durable and stylish storage solution.

Black Melamine Shelf Board: This SSWBasics laminated shelf board has a black melamine finish over a particleboard core, a sturdy shelf for retail displays, cabinets, closets and pantries.

CUSTOM CUT TO SIZE: Choose your width and depth for a replacement or additional shelf in compatible cabinets, pantries, closets, and storage furniture. Each shelf is made to order to your specified dimensions, with no cutting or trimming required.
7. Dedicated Shoe and Sweater Shelving

Dedicated shoe and sweater shelving keeps categories separate so nothing gets buried. The visible setup pairs hanging rods with open shelves at 2 depths: shallow tiers for shoes below, deeper ledges for folded stacks above.
Shoe shelves should be shallow enough that nothing piles up behind the front row; anything deeper wastes space and invites clutter.
Sweater shelves need enough depth front to back for a single folded row, with a little extra if you want breathing room.
Every inch given to shoe tiers takes it from hanging length above, so measure your longest coat before you commit.
Wood-look laminate on the shoe shelves hides scuff marks better than white melamine, though white keeps the whole closet reading as one built-in unit.

Package and Size: Overall Size: 215 x 20 x 72mm / 8.46 x 0.79 x 2.83inch (L*W*H); Thickness: 1.7mm / 0.07inch; Suitable Track System Hole Spacing: 25mm / 1inch; Package Content: 6Pcs x Shelf Brackets; The dimensions are measured manually and may have slight errors. Please confirm the dimensions before purchasing

Package and Size: Overall Size: 215 x 20 x 72mm / 8.46 x 0.79 x 2.83inch (L*W*H); Thickness: 1.7mm / 0.07inch; Suitable Track System Hole Spacing: 25mm / 1inch; Package Content: 4Pcs x Shelf Brackets; The dimensions are measured manually and may have slight errors. Please confirm the dimensions before purchasing

Comprehensive Package: our package consists of 10 adjustable shelving brackets, easy installation without tools, designed to cater to your extensive storage or display needs, ensuring you have adequate brackets for multiple shelves
Tools Needed
A drill, level, tape measure, and saw handle most of these builds. I would add a stud finder the moment I am anchoring anything that holds weight, which is most of the time.
A miter saw saves time on repeat cuts if you are running cleats around 3 walls, but a circular saw and a steady guide work for a single closet.
Furring strips and 1×2 MDF boards both serve as cleats; I pick based on what the local store stocks and whether I plan to paint.
Drywall anchors have their place, though I treat them as backup, not primary support. For shelf boards, 3/4-inch hardwood plywood cut to strip width gives more strength than the big-box particleboard shelving, and the primed face saves a coat.

Size: Shelf pins fits all cabinets with 1/4 Inch (6.35mm) holes. You will recive 50 pcs L-shaped shelf bracket pins, Cabinet shelf clips diameter is 6.35mm/ 0.25 inch, helf pin length 8mm/0.32inch. Please make sure the thickness of the cabinet will not lower than it

Secure Shelf Support:These clear shelf support pegs feature a durable plastic construction with a 5mm (0.2 inch) diameter, providing reliable hold for cabinet shelves, closet shelving, and bookshelf organizers without slipping.
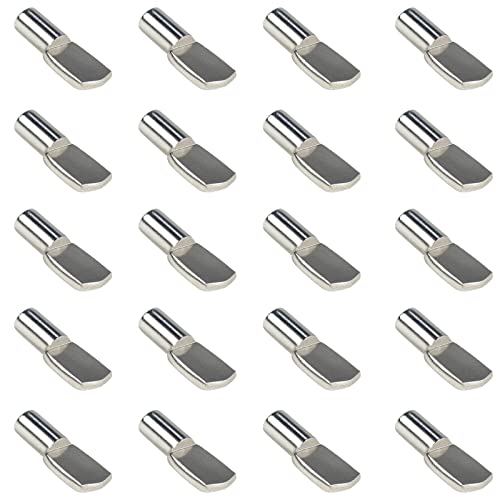
【Function】Shelf support pegs are hardware accessory that is used to support a shelf in place. Flat spoon shape design which prevent shelf wobble, it make the board sturdy enough to keep level and stable, which perfectly meets your heavy loading requirements. Shelf pins would come in handy with any DIY wood shelving projects with 5mm shelf holes
Planning Your Closet
I start every closet by measuring what I actually own, not what I wish I organized better. Long coats need more hanging length than most people give them; anything too short and hems bunch on the floor.
The top shelf in a standard reach-in sits at 84 inches, middle shelves around 42 inches, bottom shelves 6 to 7 inches up to clear shoes. I leave 12 to 15 inches between shelves in-between, but I adjust that for what sits there.
Baskets look tidy on paper, so I bring the ones I plan to use into the closet and set them on the floor.
Their true dimensions, handles included, tell me whether two fit side by side or one leaves awkward dead space.
I mark where the cleats will go, directly under each shelf line, then run a stud finder and mark those spots in a different color so I don’t confuse them during the install.
The 2 sets of marks rarely line up perfectly, and I want to know that before I cut anything.
Generally, the top shelf in a closet is installed about 84 inches from the floor, middle shelves are frequently placed around 42 inches from the floor, and bottom shelves start at about 6 to 7 inches from the floor to provide enough clearance for footwear.
— Bob Vila

【Set of Six 47.5‑Inch Rails】Six matching rails provide ample vertical support for multiple shelving configurations, ideal for closets, pantries, garages, or laundry spaces

Package Including: You will receive 120pcs wire shelf loop clips, 240pcs screws. Size: 29x9x7.5mm/1.14x0.35x0.29inch(L*W*H), center hole size: 5x6.6mm/0.2x0.25inch(H*W), mounting hole distance: 16-20mm.

1 Pair Wardrobe Tube Closet Concave Shaped End Support Flanges with Installation screws
Installation Tips
Every cleat gets checked with a level before the first screw goes in. A tilted cleat guarantees a shelf that slides items toward one corner, and that error compounds across a whole closet.
Side walls are different; they see less load and can sometimes take a properly rated anchor if the stud layout forces it.
The level matters twice: once when the cleat goes up, and again after the first screw tightens, because the act of driving it can shift things.
I check the next cleat against the first rather than the floor, since floors slope more often than walls do. A shelf that reads level against a tilted companion looks wrong even if both are true to the room.

DIY Design. 6 pcs 12 inches rigid LED strips with easy connectors. Power splitter and extension cables included for different layouts. This under cabinet light set is perfect to work as undercabinet lighting, above kitchen counter lights, or any other cabinet lighting, shelf lighting, cupboard lighting, closet lighting, gun safe lights, display cabinet light, bookcase lights, TV back lighting, gun safe light, etc.

Manual Control Design – No Motion Sensor: This RGB under cabinet light is designed for remote and button control only. It does not include a motion sensing feature. Simply turn it on/off and adjust colors and brightness using the remote or manual switch for precise lighting control without unexpected activation
Frequently Asked Questions
How to build cheap closet shelves?
Melamine runs about $35–$50 for a 3/4-inch 4×8 sheet at most home centers, and the prefinished surface means you skip the priming and painting that plywood demands.
For the structure, 1×2 MDF boards or furring strips work as cleats; buy what your local store stocks and skip the premium wood grades.
A circular saw, drill, level, and tape measure cover the cutting and mounting; I add a stud finder whenever I can, since drywall anchors eventually give under a loaded shelf.
Is it cheaper to build or buy shelves?
Building your own shelves is almost always cheaper than pre-made systems, and the gap widens when you need custom sizes to fit an odd closet.
Building your own costs less in dollars but more in hours: figure a full Saturday for measuring, cutting, and getting everything level, against a couple hours snapping together a kit from the store.
I think the built look is worth it for a closet you open every day, but for a rental or a space you might reconfigure soon, a metal track system with adjustable brackets keeps your options open without the full custom commitment.